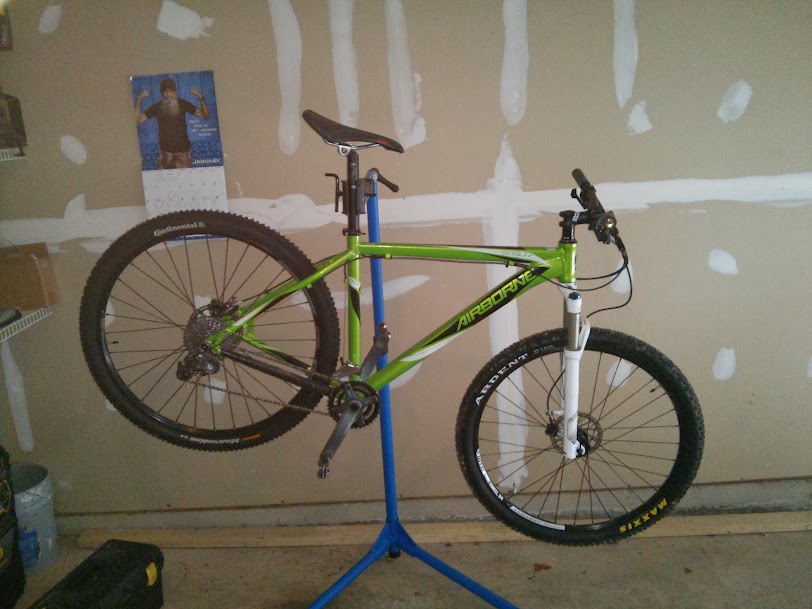
My bike has never been so clean.  The continued below freezing and icy temperatures here in northern Virginia are helping me keep well on the road to recovery and not be tempted to get out and do any serious rising before my injury heals.

You may recall that a few weeks ago I fell off while riding back in England and split my knee.  Well shortly after that was just over the hill and on the road to recovery I decided to play soccer...for the first time in 2 years!  Needless to say I banged the same knee which promptly swelled up and three weeks later I'm sporting some nice purple and yellow bruising indicating a ligament strain.  Thankfully its healing well and it is nothing more than just a strain but not being one to sit around I've turned to the cycles in the gym to keep my legs spinning and my cardio levels up as best I can.

Some nice bruising on the back of my knee
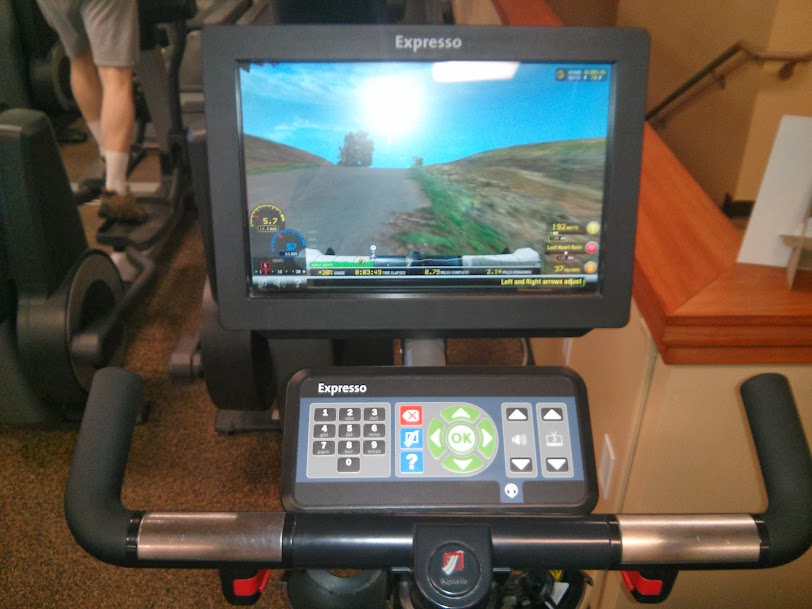
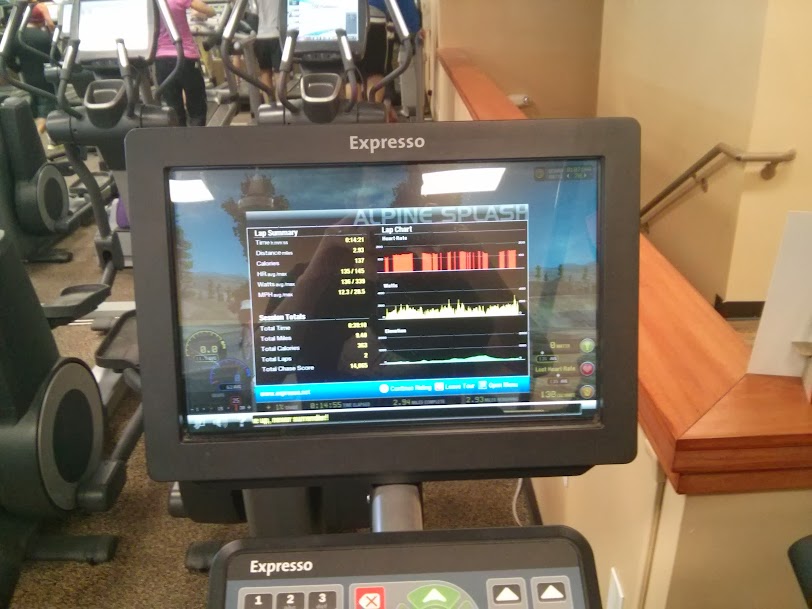
I've always found exercise bikes a little boring and I don't think my knee is ready to hold up to a spin class, so I was particularly pleased when I came across an expresso interactive exercise bike in the gym this morning.  I've never seen or used one before but essentially you set yourself up as if you are on a real bike, with handlebars that turn and buttons that simulate gear shifters.  There was a choice of programs, I picked to start off with a virtual tour which included gradients, a pacer and other riders to overtake.  following that i played a game where you had to grab coins and cycle around to catch dragons, a strange concept but surprisingly fun.  Needless to say, until I'm able to get out again for real I'll be hoping I can jump on this machine to inject a bit of excitement into my exercise bike time in the gym.

Upright Bike

Expresso interactive fitness bike

 
After the not so successful attempt at switching out the Goblin's SRAM X7 front derailleur for the Shimano XT, I managed to resell and recoup most of my money for the XT on eBay.  However this meant it was now firmly back to the drawing board.  After browsing, researching and thinking about it some more I figured my best bet would be to replace like for like wherever possible.  So keeping my search within the SRAM family I was initially looking for a decent price on and X9 FD, however a Google search threw up this beauty for sale brand new and shipped for a shade over $40:


Happily for me the derailleur arrived in the mail yesterday and was packaged up pretty well.


Goblin on stand ready for fitting

Before and After

Thank fully fitting was a straight forward process and adjustment took no time at all.  Now just hoping that this knee gets better soon and I can hit the trails!

I was extremely fortunate this Christmas to receive a little bit of money as a gift from family, not wanting to waste it I wanted to ensure that I invested it in something that could potentially be with me for a long time.  After brainstorming some of the items I want, some of the items I need, and some of the items that have always been firmly on my intend to purchase list, I decided to go ahead and treat myself to a work stand.

Looking around the net and the usual places there are a couple of main brands in this space however one that seems to get excellent reviews and is spoken about with high regard is Park Tool.  I guess they are kind of the Rolls Royce of bike tool manufacturers.  As always budget is key so looking through their range I could see that I wouldn't need all the bells and whistles of their top end stands, just something that would be portable and could be stored away easily.  Their entry level PCS-9 fitted the bill perfectly, as usual I set about finding the best possible price and found a used but good condition one on Amazon for $109 shipped.


The package arrived a little beaten up but to my surprise the actual stand is wrapped and appears as if its completely brand new and unused.  An absolute bonus, as i have no need for the packaging.  Set up was straight forward and the instructions easy to follow, its supplied with hex wrenches and and a spanner required to tighten the few bolts required.  Here's hoping this remains a stable of my garage for years to come!

Out with the old in with the new.  After finally deciding to give clipless pedals a try earlier this year I'd scoured places such as eBay and Craigslist to find a cost effective possibly used depending on cost set of MTB shoes and clipless pedals.  I wanted to try things out for little money as if I didn't like the feeling of riding clipless I'd be safe in knowing that I'd be able to resell my purchases for a similar price.  This led me to purchasing a set of Shimano SPD M520 pedals and a pair of Specialized Primo MTB shoes from old faithful eBay.  All in both the pedals and the shoes ran me out a little over $50, a small price to pay to try clipless.


A quick Google search will throw up hundreds of results and forum posts on the debate of riding clipless vs flats etc.  This is not the purpose of this post as each and everybody has their own preferences.  Purely from a personal perspective however I was immediately hooked and couldn't believe it had taken me so long to make the switch, I love the feeling of being completely connected to the bike and the great thing about the Shimano M520s is that they are multi-release with adjustable tension, so I've yet to have a situation where I couldn't unclip almost as fast as I could put my foot down.

Anyway getting back to point, I'd ridden in the Specialized Primo shoes at every opportunity, however I'd promised myself that if I liked clipless I'd purchase a pair of new to me shoes and at the price point I found it hard to look past the Mavic Pulse.  They offer everything I need and seem to fit completely true to size with room in all the right places.  Weighing in at 340 grams, Mavic describe the shoes as "Perfect for fast trail riding without breaking the budget. The World Cup proven profile of the Energy Grip Outsole is combined with a solid trail ready upper for responsive pedaling and trail gripping comfort".  I can't wait to get out and ride with these, check out the review section for my full verdict in a few weeks.

At this time of year it becomes increasingly important to make sure that your chain is clean, lubed and functioning properly.  With the damper conditions here in the North East, dirt, gunk and muck build up on the chain quickly.  Thankfully there's an extremely quick and effective way to get the chain shiny again with minimal time and effort.

For my DIY chain cleaner I used the following:
  • Empty plastic bottle or container with wide opening
  • Mineral spirits (available from any home improvement store)
  • Dirty chain
I find KMC chain links easier to use and reuse making taking the chain off the bike a simple process
Once you have everything in place the process is pretty simple, pour a small amount of mineral spirits into the bottle, you don't need much and I only filled up to the bottom of the label.  Then drop in the chain and the powerlink.


With the mineral spirits and chain in the bottle, screw on the lid and shake for a couple of minutes.  You'll find the the liquid goes dark extremely quickly and starts to work right away.


After a couple of minutes, dispose of the liquid (I poured mine into a different container and reused to clean my cassette).


Once finished wipe everything down with a cloth and you'll have a sparkling chain ready to fit back on the bike.


Don't forget to lube up the chain again for your next ride!  I've picked up a bottle of Finish Line Ceramic Wet Chain Lube which I'll be using for the first time.  Check back in a few weeks and I'll post an update of its performance in the reviews section.

As mountain biking has been my main hobby these last few months, Christmas arrived with perfect timing and the bulk of my gifts from the bearded fat man in a red suit centered around the mountain bike.  As its snowed pretty heavily this week here in NOVA and everywhere remains covered in a layer of ice, this morning seemed the perfect time to change things out and fit the new upgrades to the Goblin.


I decided to attack the tire first and having already set the Maxxis Ardent up as tubeless on the front I wanted to set the conti mountain king up as tubeless on the back.  I followed the same method as I had for the Ardent using Gorilla tape and using and inner tube to seat one side of the bead.  I learnt a solid tubeless lesson today however in that I'd been able to seat both beads of the Ardent with just a floor pump and without adding any sealant to the tire.  This just wasn't going to happen with the mountain king and after some serious frustration, I added sealant to the tire, and then got busy with the floor pump.  This did the trick, and the sealant helped the bead snap into place, like many things with this bike its a learning curve and next time I'll add sealant before seating the second bead.


Once the tire was set up I swapped out the front and rear QR skewers for the Superstar ones and finished the job on the wheels.

The bars were next, a quick shot taken next to the old Race Face bars I had on show the extra width.  Thankfully the bars were a straightforward swap just loosing a few bolts and lining things up.

Old Race Face Evolve bars (660mm)
Old vs new
With the new bars in place the grips were next, I'd read a few reviews etc saying the ESI Chunky grips could be a little troublesome to install however this couldn't be further from the truth, the intructions said to ensure the bars were clean and to dampen the bars before install.  The moisture gave just enough lubrication to get the grips in place with minimal effort, and once dried they feel pretty solid.

Bars and grips all complete
The final switch was for the seat post and I have to say the old one was looking pretty tired.

Old seat post
Old vs new
With the old post off the bike I also swapped out the hex bolt clamp for the Superstar QR

A much cleaner look (fresh paint)
Overall I'm extremely pleased with the look and feel of the bike on the brief test ride round my garage and can't wait to get back out on the trails (subject to weather and my messed up knee healing).

The finished (for now) Goblin
Whilst back in the UK for the Christmas Holiday, my cousin asked me if I wanted to squeeze in a ride out on the mountain bikes.  Having been many months since I last rode in England I jumped at the chance.  His suggested destination was Hamsterley Forest, a mountain biking mecca in the North East of England boasting all kinds of trails from dedicated downhill competition routes to XC trails with varying levels of difficulty.

We chose December the 23rd as the day to ride, and the weather was pretty bad with heavy rain and strong winds, thankfully the trails are set in the forest which is enclosed within a valley, so once we'd started the ride there was only the wet weather to contend with.


With conditions far from perfect we decided to mainly stick to the red route doing a few laps of some sweet singletrack downhill sections.

save image

Weather aside the only other downside was that I managed to take a fall and mess up my knee.  An unknown bike, an early jump and a little over confidence led me to lose my balance and take a spill.  With all the mud and dirt the wound got pretty dirty and required a doctors visit the next day along with a course of antibiotics...lesson learned, more caution needed on a new bike!